
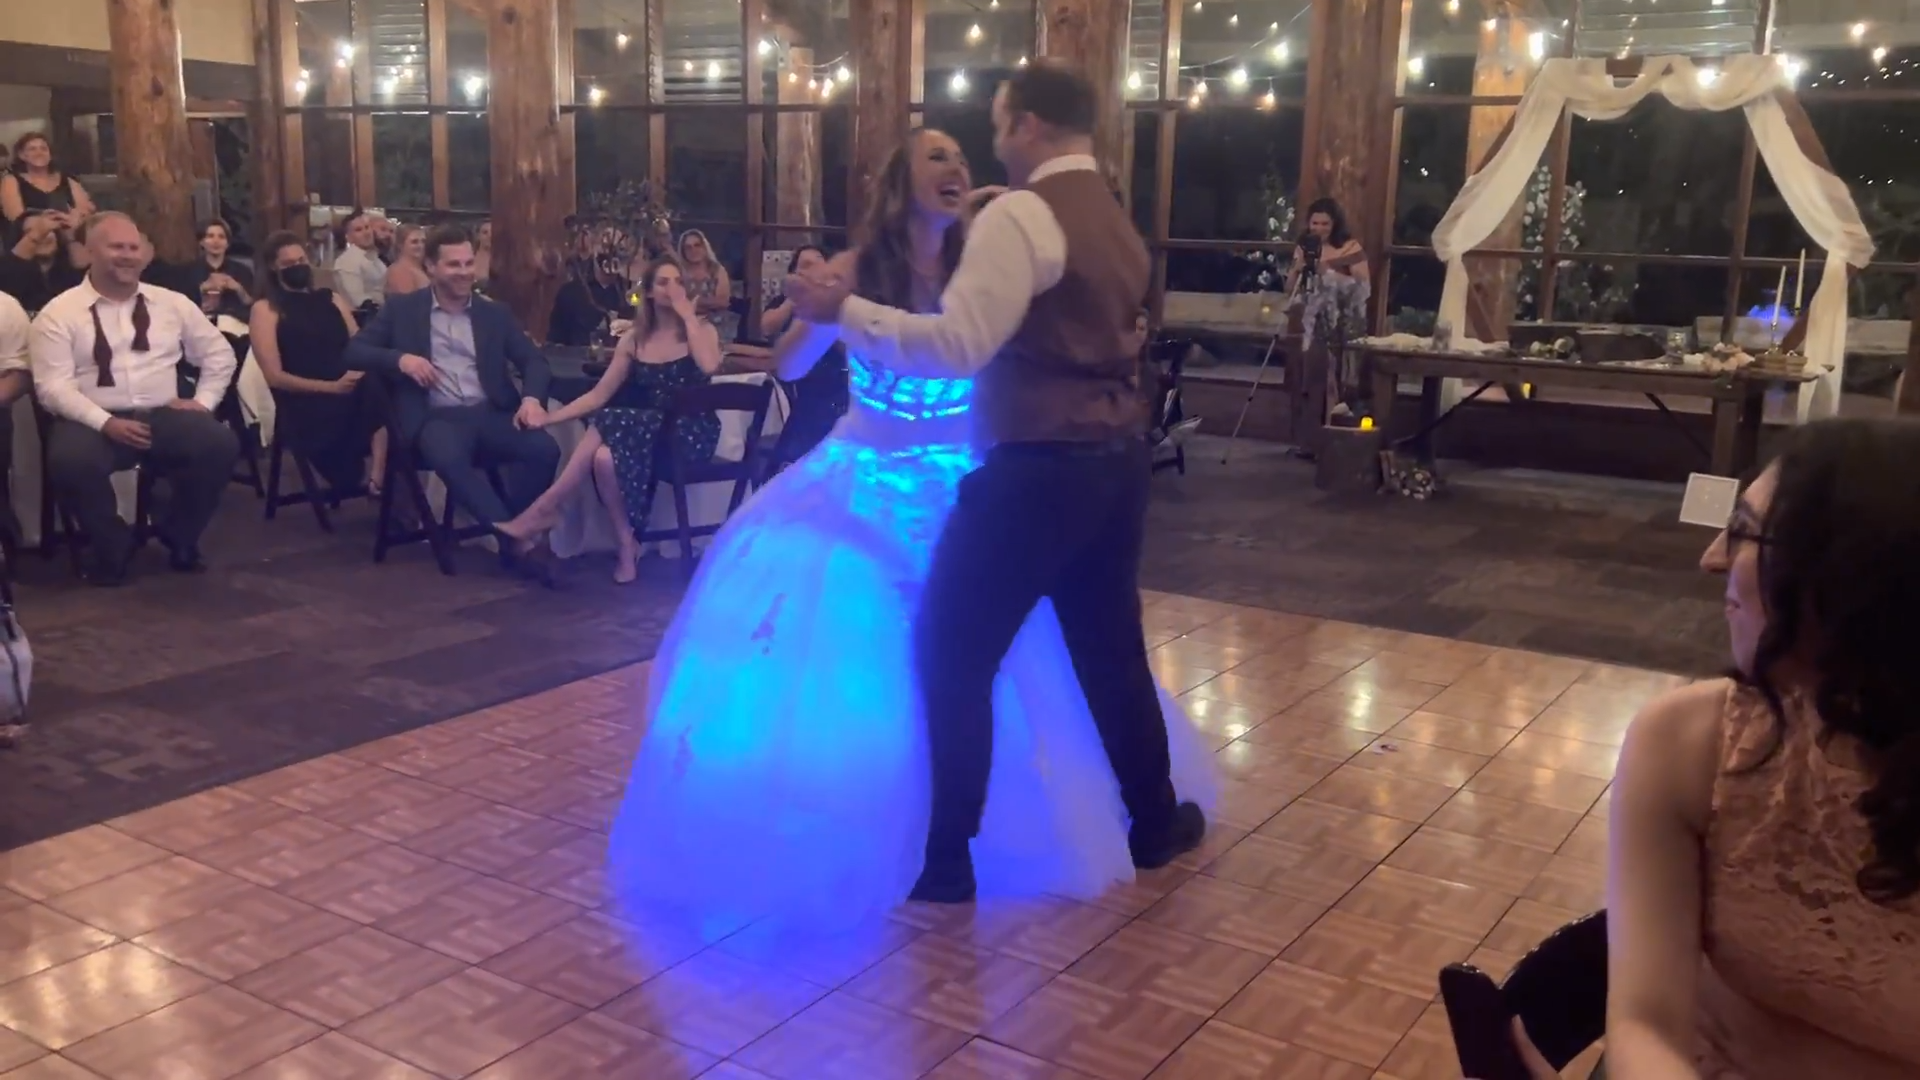
The Idea
A couple years ago I purchased some RGB strip lights for our Christmas tree, just to mix things up and have something different. They were relatively inexpensive and could be controlled via bluetooth and wifi. After tinkering with it for a while, I settled on a cycle of colors that felt “Christmassy” enough and did my best to diffuse the lights so they weren’t just sharp points of bright colors in the tree.
Fast forward to a year ago, my wife and I were discussing our wedding plans and our first dance. I don’t recall exactly how the topic came up, but she suggested using the Christmas tree lights as part of her dress to mimic Princess Aurora’s dress from Sleeping Beauty. An interesting engineering challenge emerged, and I couldn’t resist the opportunity to tinker (and if I was successful in making my wife into a Disney Princess in the process, all the better!)
Rachelle’s initial idea was to simply take the RGB LEDs from our tree and wrap them around her dress, controlling it via the connected app. Though a solid idea, the total number of LEDs from the Christmas tree would mean very little coverage on the dress itself. Plus the app wasn’t quite as reliable as I’d like, so it was time to over-engineer a solution.
Proof of Concept
After browsing around online and not finding anything really similar to what we were hoping to achieve, I decided to start tinkering and see if the concept was a tenable one. I purchased a pack of Arduino Nanos and a couple spools of WS2812B LED lights to get started. Using the FastLED library on the Arduino Nano, I whipped up a quick test animation, transitioning from blue to pink, and wrapped the LEDs around the back of a chair to test it:
Next I adjusted the distance between the strips of light to get an idea of how many lights we would need. After some tinkering, I discovered that a lower brightness setting on the lights paired with a higher number of lights looked better than fewer lights with max brightness. Using the petticoat, and lots of tape, I laid out the lights and tried to visualize how it might look on the dress.
The Final Product
The biggest engineering problem with the lights was that they were going to be on a dress that I would not be allowed to see until the wedding day. Which didn’t leave a lot of options for adjusting and perfecting the lights themselves. I was beholden to Rachelle’s description of the lights as she held them under the fabric of the dress. But my observation of increased density with lower brightness seemed to be the way to go, now to figure out just how many lights we would need; and, more importantly, how best to turn the lights on during the dance.
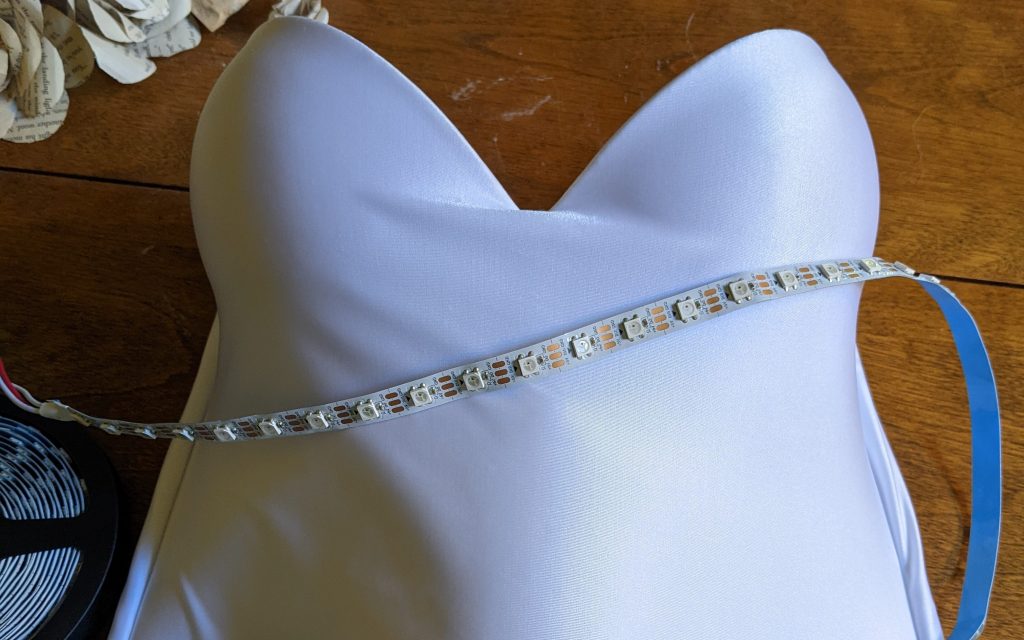
The petticoat was simple, it took 600 LEDs, around 33ft worth, spaced roughly 6 inches apart to encircle the dress and look halfway decent when turned on. Next, I began by taking the corset top Rachelle had purchased and laying out the lights as best I could. The goal was to get as many LEDs on there as possible, with my lesson of higher density lower brightness in mind. These lights would sit closer to the surface of the dress and would not diffuse as much light as the bottom half would, so I attempted to mitigate striping and sharp points of light as best as I could.
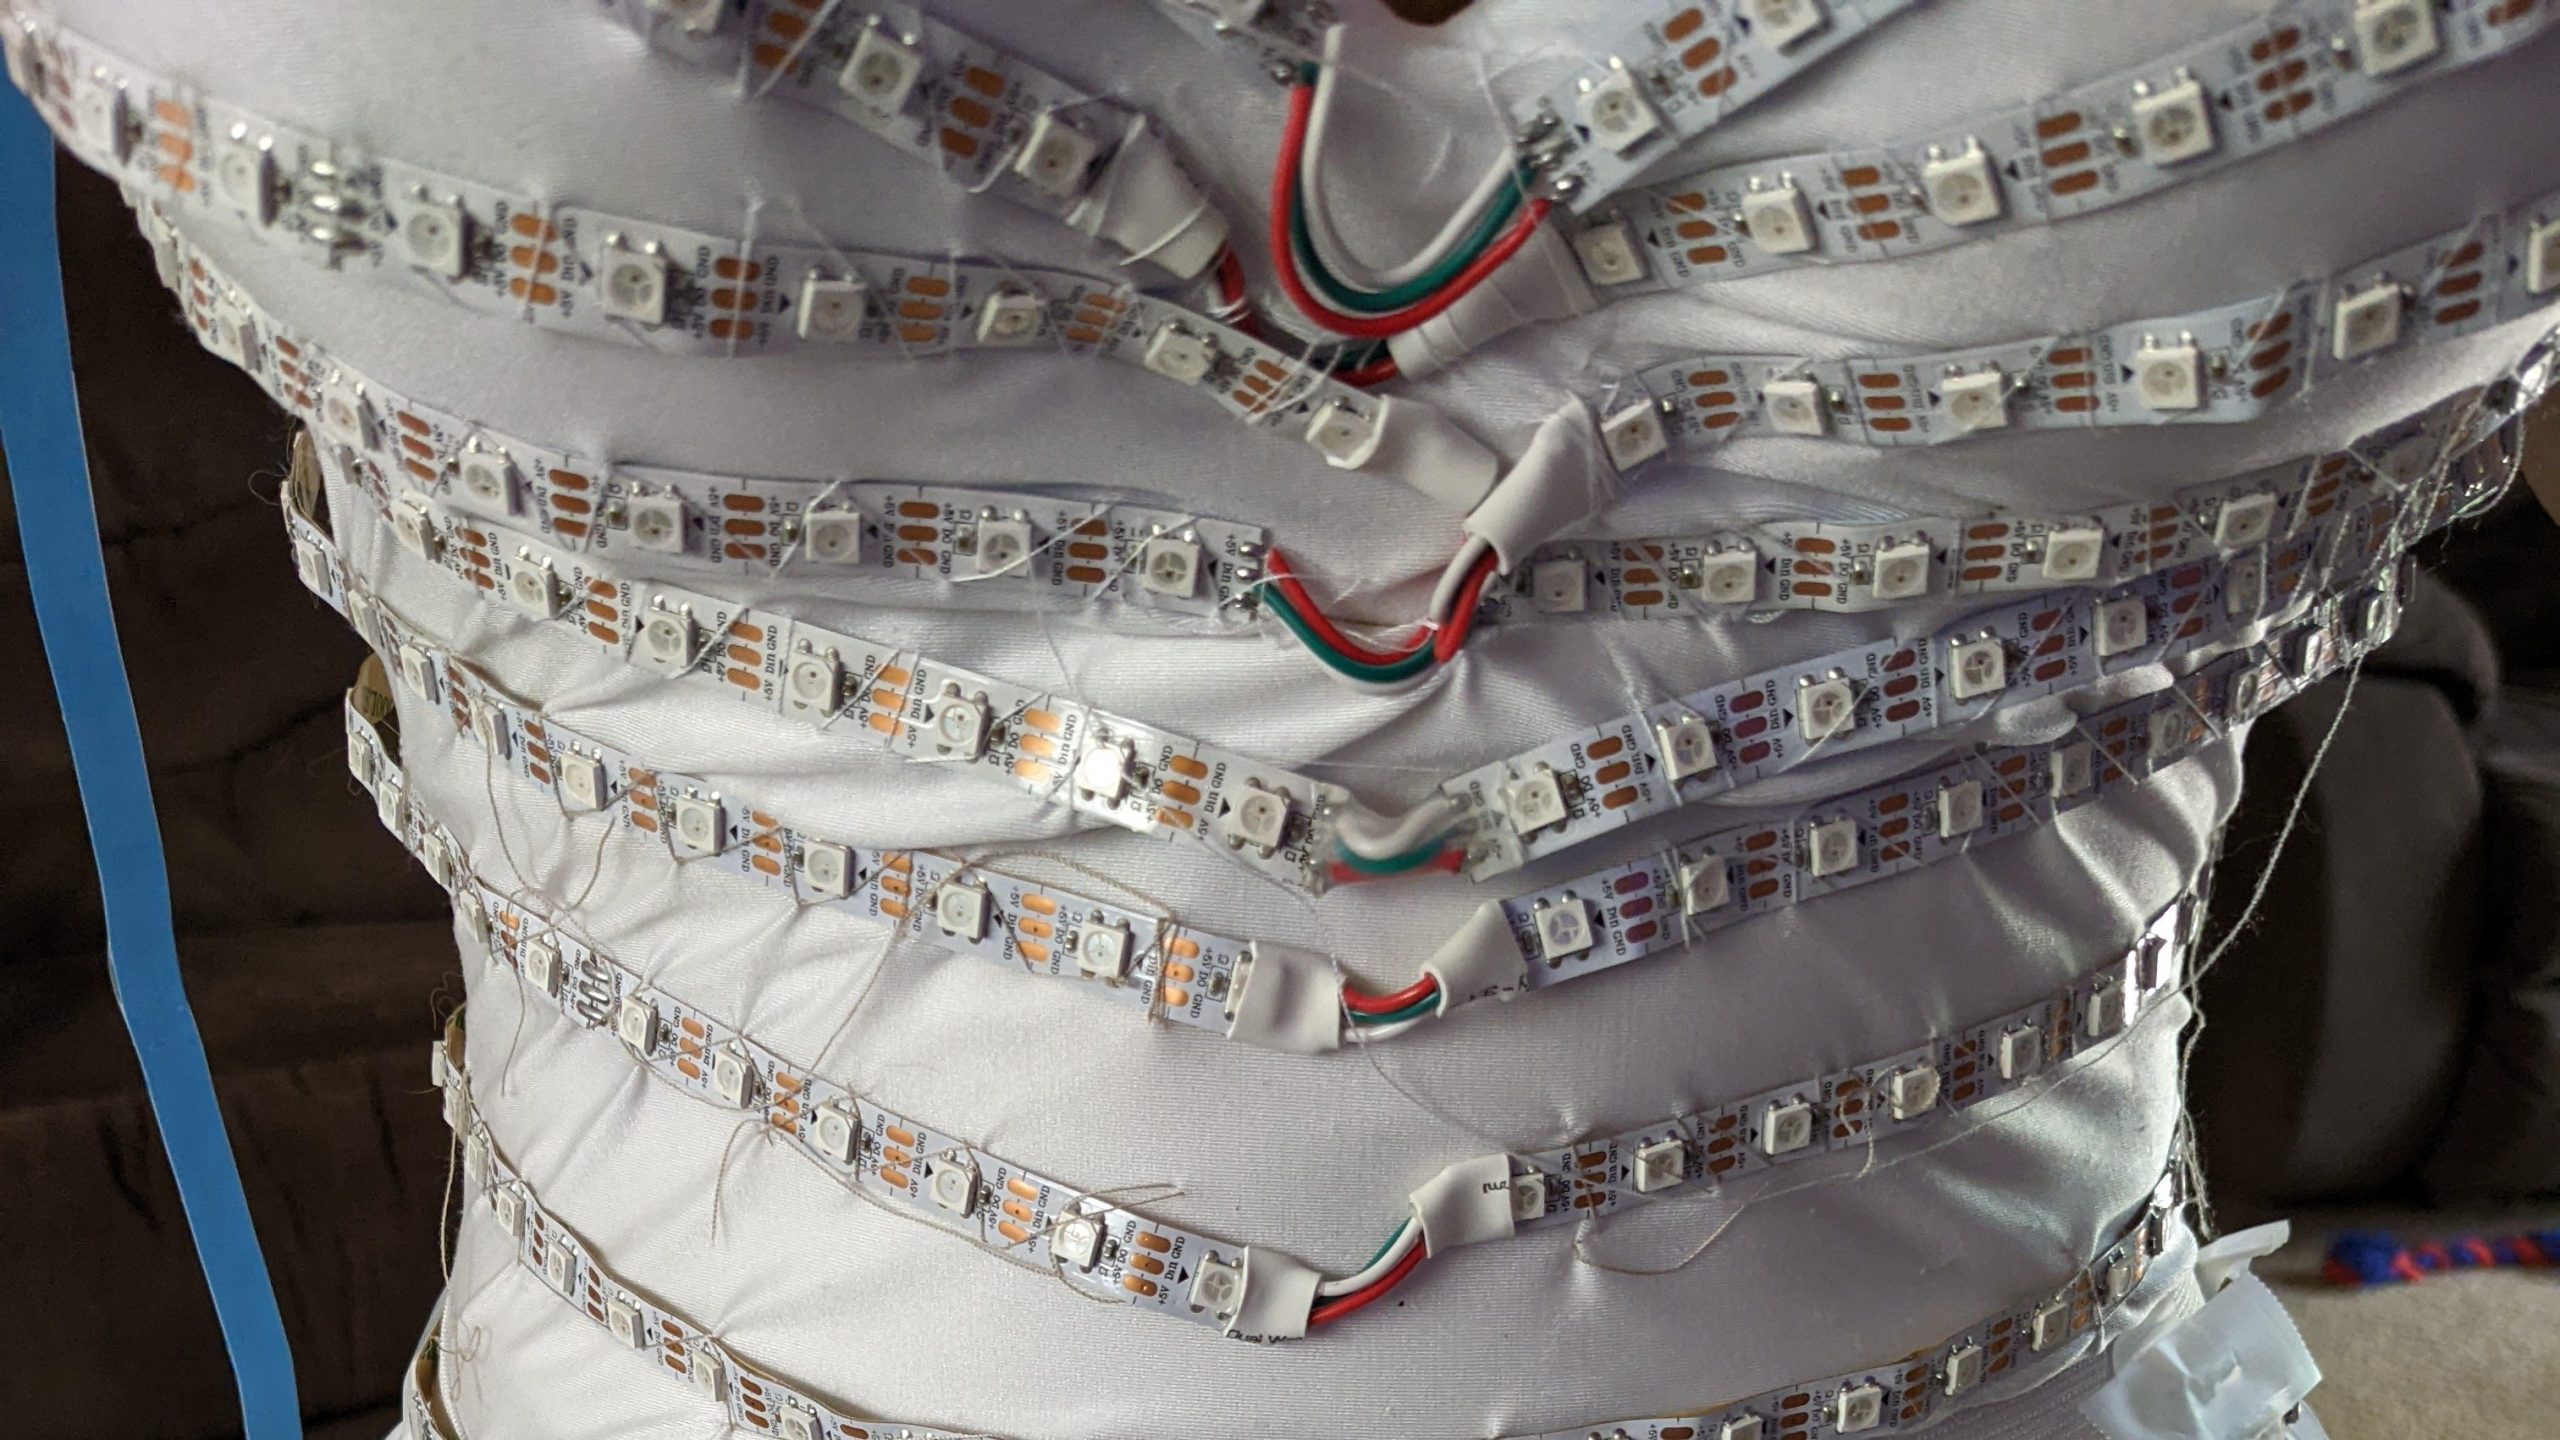
A couple different layouts were attempted. The, ahem, topology – so to speak – proved challenging for the LED lights since they only bend and flex in one dimension. This meant that I would need to cut and splice to get them to fit properly. I didn’t want to risk additional points of failure where possible, so I tried to minimize the number of solder points, and strengthened them with some heat-shrink tubing.
Once I had the final layout done for the top, I tallied up the total LEDs used for the entire dress: 1,200. Now, I had to figure out how to power them all. At the brightness I was running, each 300 LED segment would draw a little over 2amps. My hope was to use simple USB battery banks to run it all, so I wouldn’t have to wire up the overcurrent and other safety circuitry. Wanting to keep my wife from being electrocuted or burned was high up on the list of requirements for this project. Most of the battery banks I had in my possession topped out at just under 1.5 – 2amps of output. So I could either supplement the power with additional battery packs between each 300 LED segment, or I could find battery packs with higher output. I settled on two high capacity, and higher output battery packs: Two Anker PowerCore 20’s, providing more than enough total capacity to run “The Rig” as we would affectionately call it, and had multiple ports that could put out 2.4 amps. Just a little more than I was needing.
After connecting everything together, wiring it to the battery banks and plugging in the Arduino, I discovered a constraint with the LEDs I hadn’t thought to consider: a max of 600 LEDs could be operated by the Arduino. There are a few ways to get around this limitation programmatically, but with the animation I was hoping to run I had already used 92% of the Arduino Nano’s available memory.
My original plan was to use a 433MHz RF remote connected to a relay to turn everything on, but now with this new limitation of 600 LEDs I started to reconsider the entire set up. I briefly attempted using a Raspberry Pi to power the LEDs, which would allow me to get around the limitation and power all 1,200 lights. But I worried that it was overpowered for what it was doing, unreliable since the functionality to “turn on” the lights would be based in software instead of a simpler relay, and add additional bulk to what was already becoming a very bulky setup. I scrapped that plan, and went with a simpler 2 Arduino setup.
One Arduino Nano would power the 600 LEDs for the top, and another would power the 600 LEDs for the bottom. After some tweaks with the timing in the software, I had it dialed in sufficiently that they worked in lock-step and the observer was none the wiser that the 1,200 lights were technically two different systems.
To contain the two Arduinos, a relay, and two battery banks, Rachelle purchased some yoga shorts with ample-sized pockets as a means to contain it. Which works beautifully, it’s all hidden under the dress and the shorts housing the heavy electronics and batteries alleviate any pressure or structural stress on the petticoat. My Mom helped sew the lights onto the petticoat and corset top, and used double stick tape where sewing wasn’t possible. (Thanks Mom!) It was all set and ready to go live.
Is there a better way to set all of this up? Surely. But this proved to be completely reliable, with the ability to swap parts easily if something went wrong on our wedding day in that final check before we went out on the dance floor.
The Wedding Day
I have been writing code since I was 10, and have been a professional software engineer for over 15 years now. I’ve written millions of lines of code, some of which at this very moment is facilitating transactions online, moving money between bank accounts, and more. Billions of dollars have been moved and transacted with my code. And yet, I have never been as nervous or anxious about a push to production as I was with this dress.
Over the last few months as I worked on “The Rig,” I tested everything I could, tried to find the weaknesses where possible, and stocked up on spare parts where possible. It was solid, worked flawlessly every time we hit the button on the remote, and lit up both the dress and our faces every time it came to life. That didn’t stop me from being worried. Leading up to the wedding as we practiced our dance, we tried to shake loose any potential bad connections or unearth any bugs. With a very minimal number of things going wrong, I felt fairly confident “The Rig” was solid enough for our first dance.
That didn’t stop me from ensuring I had a soldering iron, wire strippers, spare Arduino’s, extra wire and whatever else I needed to ensure everything went perfectly. The plan was to have Rachelle change into The Rig just before our dance, so as to minimize the potential to bump it and risk breaking something. Which turned out to be very smart and fortuitous, because . . .
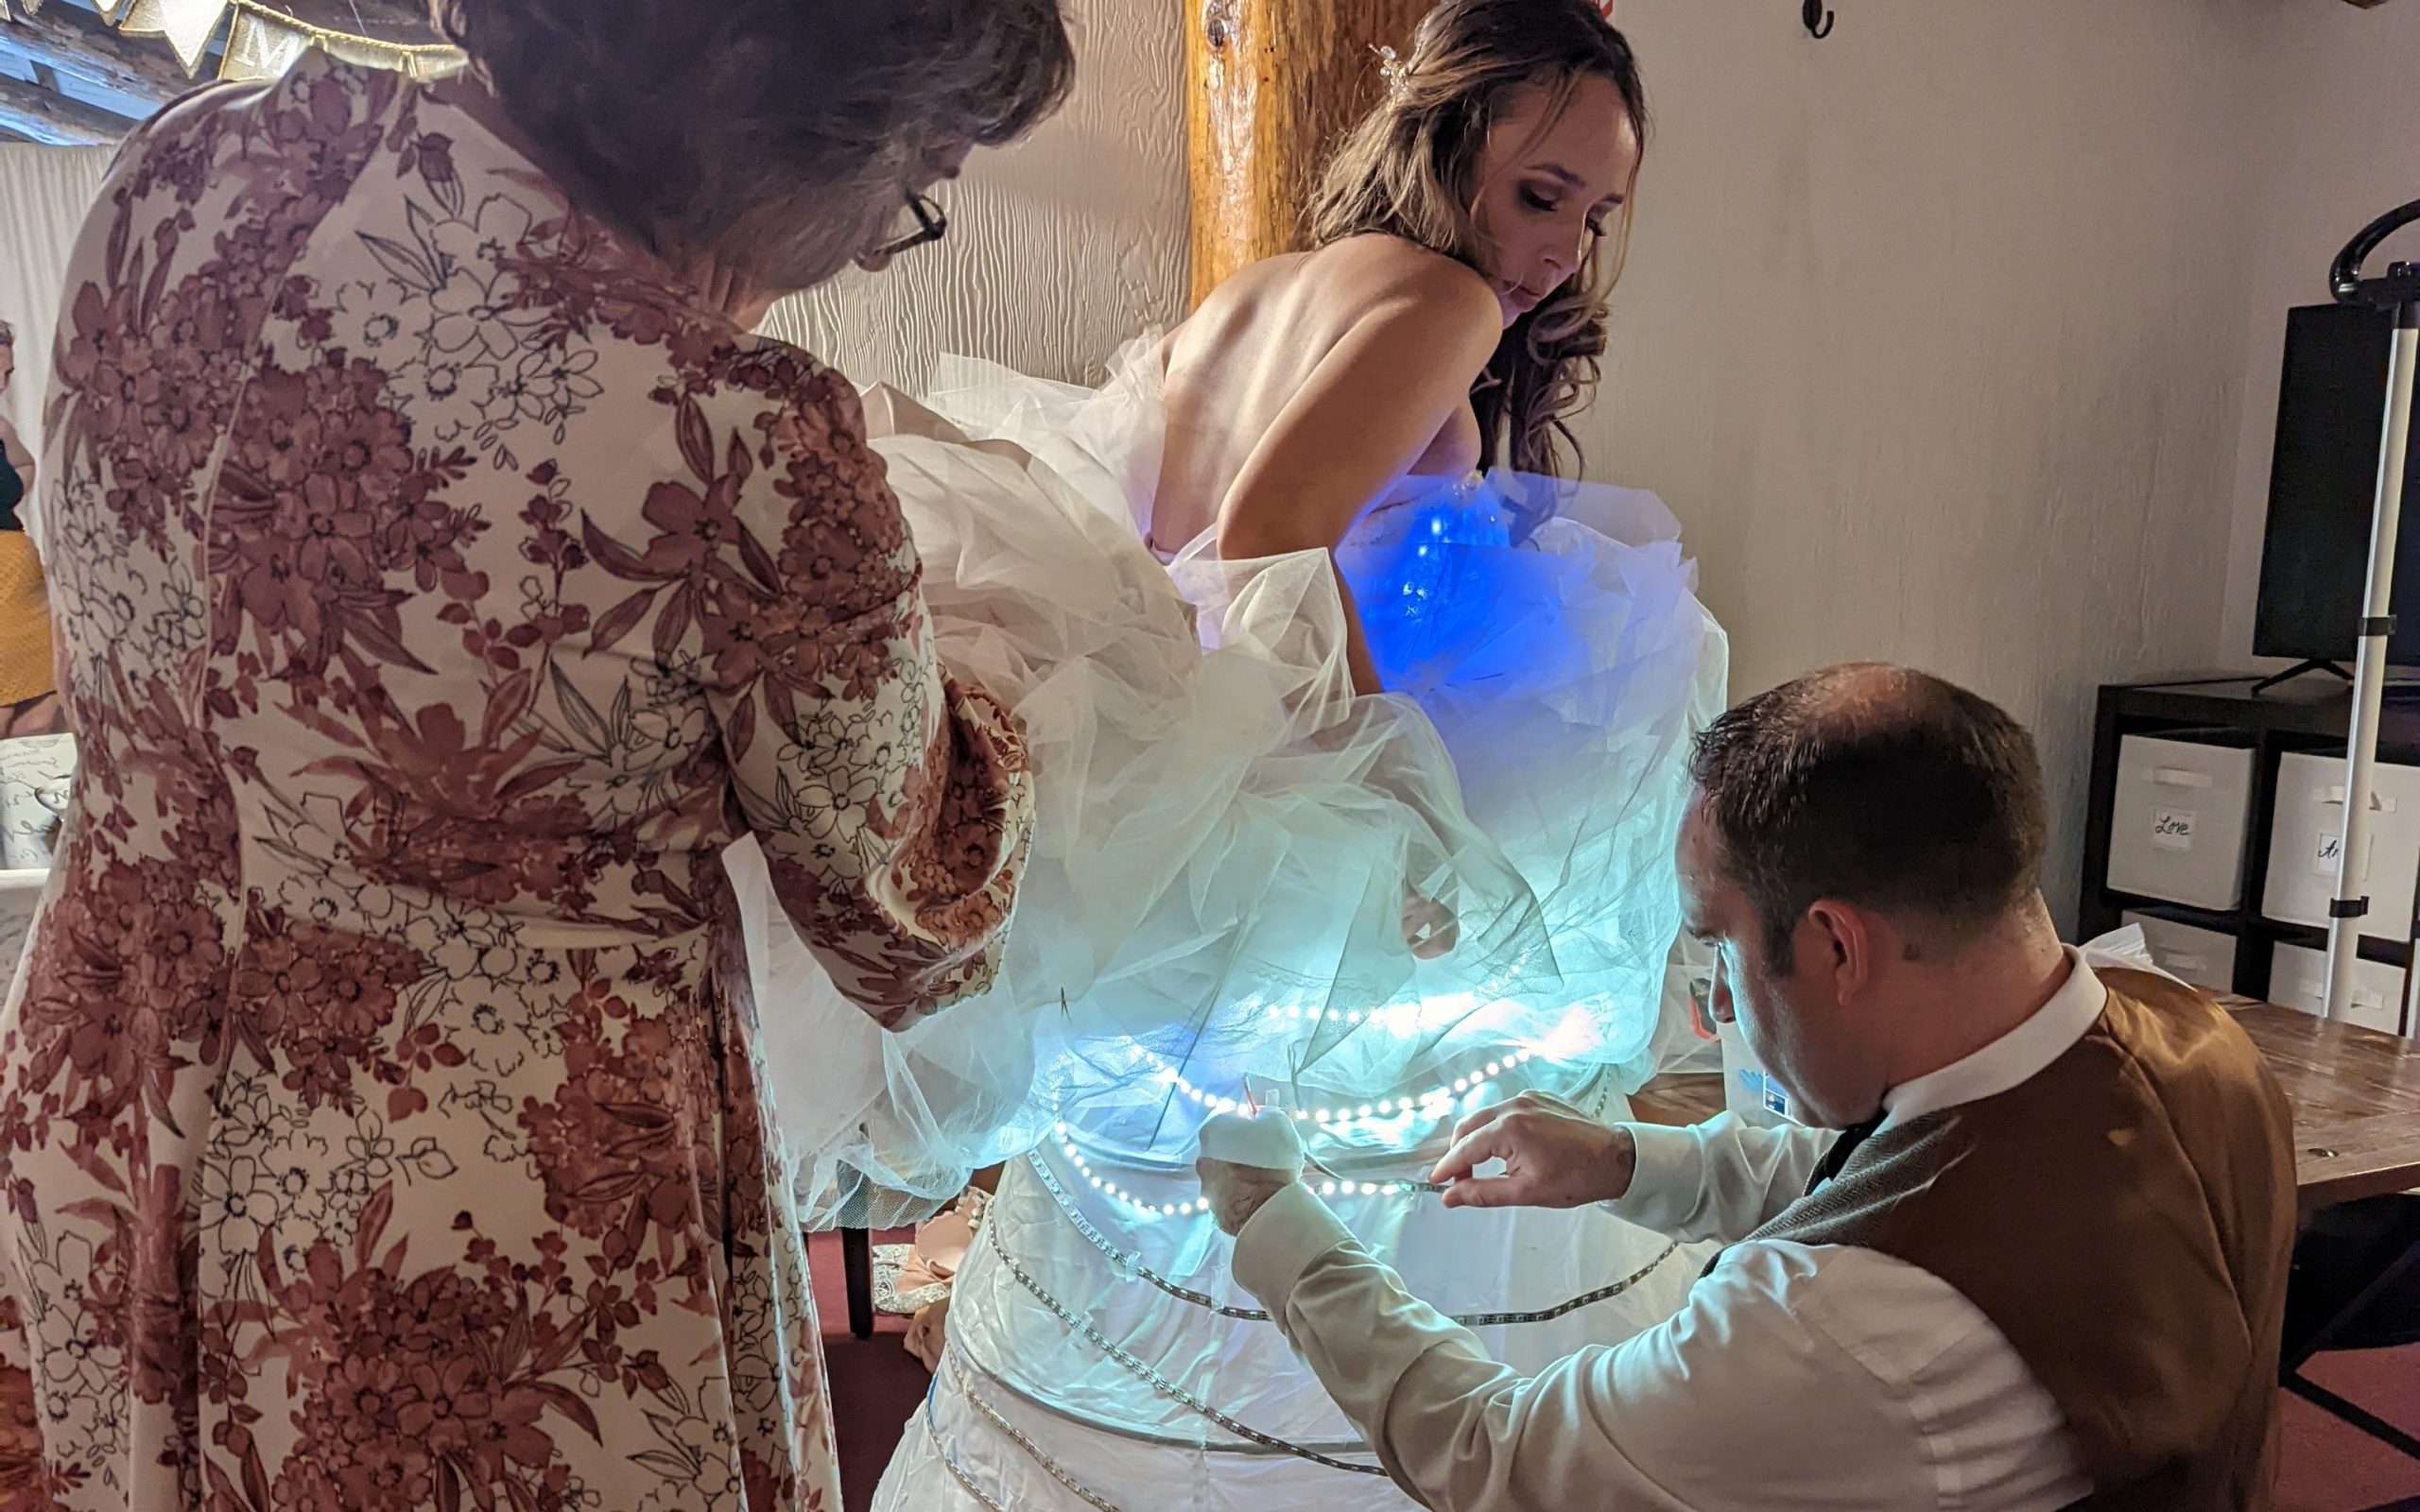
It Broke
After being whisked around post-reception taking photos, cutting cake, and attempting to socialize with our guests, the time came for our toasts followed closely by the first dance, and parent dances. We rushed upstairs to get Rachelle changed into The Rig, connected everything and then tested it one last time. I hit the button on the remote . . .
Nothing.
I checked the wires, made sure everything was in it’s proper place, saw I may have accidentally swapped the main power and auxiliary power, and hit the button again . . .
Only the middle portion lit up.
I’ll refrain from writing here the words that I used at the time, but trust me when I tell you that I was a bit upset and mildly panicked. I frantically started going over every wire, cable, and plug, trying to narrow down where the issues could be. After what felt like an eternity, I found the culprit: a data wire from one of the Arduino’s had snagged and split. No matter, this is why I brought spares. Grabbing my wire strippers and a fresh wire with haste, I cast away the inherently weak wire with extreme prejudice. The replacement was installed in it’s new home in a matter of seconds, time to hit the button again . . .
Only the bottom half lit up.
The words I uttered are not fit for print, but at least progress had been made. I scrambled again to go over every connection, and could find no fault. I made the decision to look at the relay and the Arduino’s, popping open the plastic project box to see if maybe, by some weird chance, something broke or otherwise came undone in there. The power to the Arduino had come out of it’s plug. At least it was simple, and I was relieved though a bit perturbed that such a simple problem had instilled such a feeling of anger on this day. I plugged in the offending connector, and hit the button on the remote once again . . .
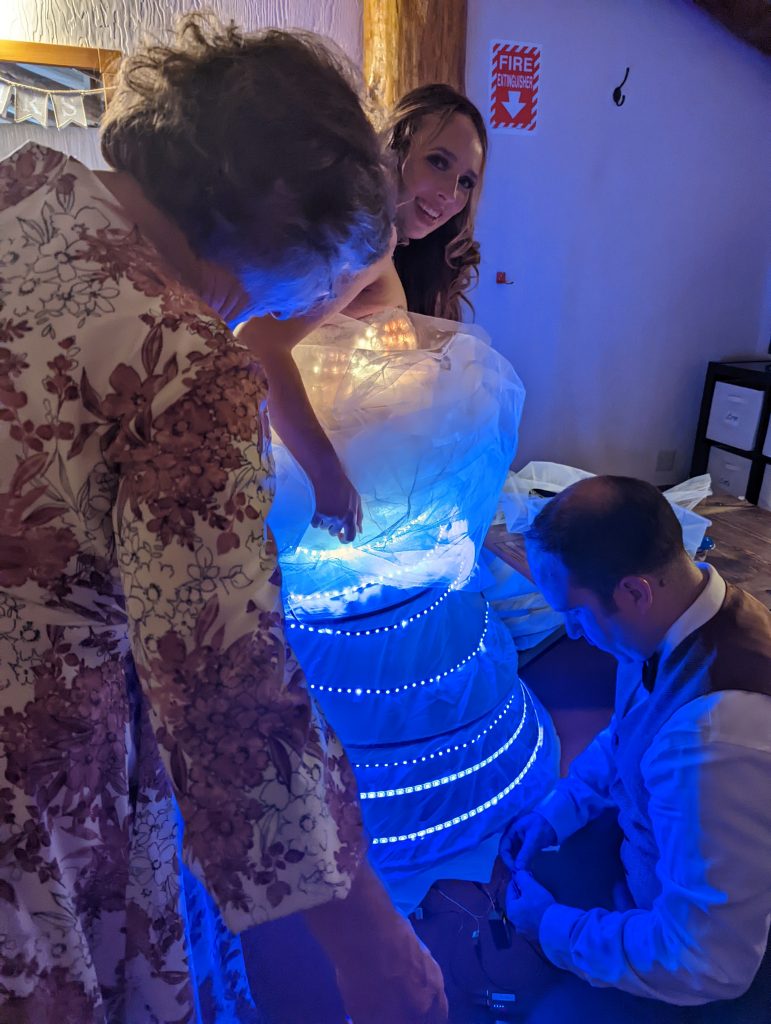
It worked! It finally worked! Months of hard work was finally coming to fruition, and we were about to pull the curtain back on this amazing dress. We made the decision to reset it, and give it one more test before going down to the dance floor. Without so much as a hesitation, the dress lit up in the most glorious shade of victory blue I have ever seen. We were solid, and now it was time to head to the dancefloor.
Lessons Learned
The biggest challenge to this endeavor was not being able to see the final product before the dance. Rachelle wanted to keep the dress a surprise for me, which I agree was the right way to go, but she did bring out the dress and let me see small sections of it with the lights. With this, I was able to tweak things a bit here and there. In one of the above videos, I used paper towels over the petticoat as an analog for the dress to dial in the brightness and colors. Which worked surprisingly well. The top however, would remain difficult to see and test. Having seen the final product now, I might go back and add some white heat-shrink tubing around the lights on the top to add additional layers to diffuse the light. This might mean increasing the brightness a little bit, but there’s sufficient overhead for that power draw. But otherwise, I’m extremely proud of how this dress came out and I’m thrilled with the response it has received.
I can’t tell you how many times I’ve watched the various videos of it and looked at everyone’s reaction when the dress turns on. It’s quite satisfying. and has made the months of hard work, and minutes of extreme stress just before the dance all worthwhile.

What a great story!
Oh My GOSH! I appreciated every detail here. But as a wedding gown creator, I envy your amazing achievement. AND your “emergency kit” for her gown is a LOT different than what I usually bring! LOL. Just beautiful, and creative! Well done!!!
Just breathtaking!! Incredibly innovative. You thought of everything especially emergencies.
Here’s to a very BRIGHT future filled with love and lights!☀️💫